Saturday, February 12, 2011

Pocket Door Installation

We have finished installing the three pocket doors that we will have in the basement. Here is a brief description of the process used for installing the doors.
  1. Framed the rough opening to be 1.5" wider than double the width of the door (e.g. 61.5" for a 30" door) and 3.5" taller than the expected height of the door.
  2. Screwed 2" wide strips of plywood along the middle of the top and right (pocket) side. In a 2x4 framed wall, this should leave 3/4" on each side of the plywood.
  3. Cut the pocket door track to be 4" less than double the width of the door (e.g. 56" for a 30" door). Installed this pocket track onto the middle of the top piece of plywood.
  4. Cut three 2" wide strips of plywood that were the equal in length to the width of the door (e.g. 30"). Installed the first piece along the floor using concrete nails since this was in our basement. Installed the remaining two pieces on either side of the top of the left (opening) side with screws.
  5. Cut ten pieces of 1x4 that were equal in length to the width of the door (e.g. 30"). Installed pieces at the top and bottom of the inside and outside of the right (pocket) side using 2" finish nails.
  6. Attached the remaining six pieces of 1x4 by attaching them to the plywood with finish nails.
  7. Cut pieces of pine to a width of 1.25" and a length of 2" less than the height of the rough opening. Installed those pieces with finish nails to the ends of the 1x4's. The idea is that the 1/2" piece of drywall will be installed on top of the 1x4's, and will butt up against these pieces of pine (hence why they are cut to be 1/2" thicker than the 1x4's).
  8. Cut down the height of the door to the appropriate height by clamping 2x4's to the door to use as a guide for the circular saw.
  9. Installed the rollers on the pocket door track.
  10. Installed the pocket door hardware on the top of the door.
  11. Hung the door and adjusted it to be level.

Wednesday, February 9, 2011

Bathroom Vanity/Sink Options

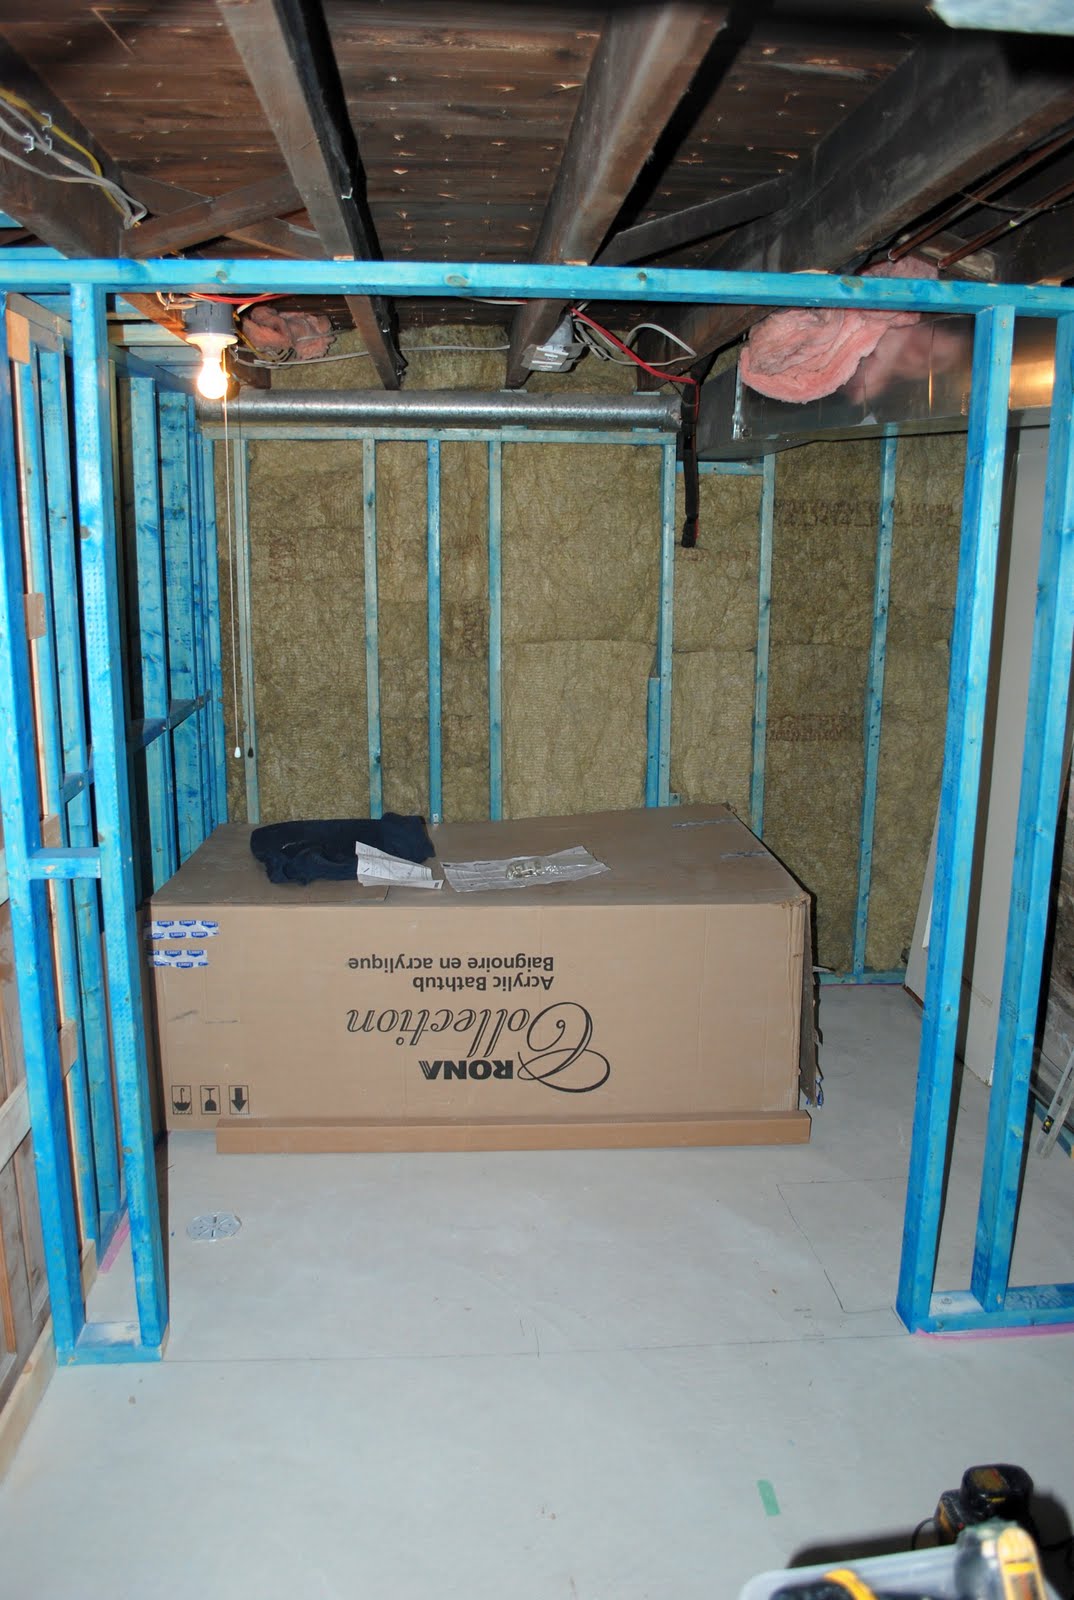
When planning the wall of sliding doors for the basement, we knew that we wanted to be able to access both the washer and dryer at the same time; in order to make this happen, we had to add another 3-4 inches onto the span of the sliding doors. In doing so, we reduced the size of the bathroom by this same amount. Accordingly, as it stands right now, a standard vanity (22" deep) would be 24" from the front of the toilet and 20" from the end of the tub. This is acceptable, but makes the space kind of tight and uncomfortable, so we started looking for a vanity that does not take up as much space.

In order to accomplish this, we need to find a vanity that is not very deep (16-19") and/or that takes up less space than a cabinet style vanity (i.e. pedestal sink). To throw another wrench into this decision, we plan to have some built-in linen storage in this bathroom, so that needs to coordinate with everything.

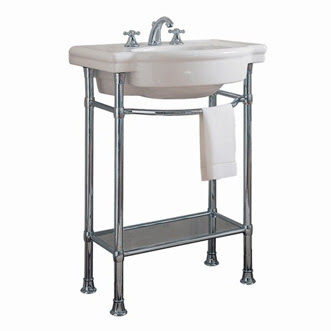
Option 1: Our favourite look right now is the Retrospect Console Table from American Standard. It would definitely meet our aesthetic and space requirements, and would match multiple wall cabinet options, but it needs to be custom ordered and is a little bit outside our budget ($700ish, plus the matching toilet is pricey).

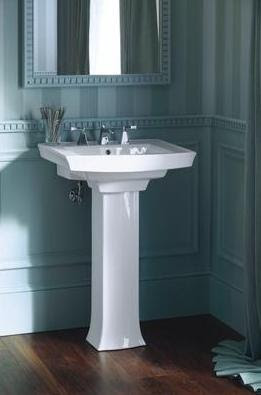
Option 2: We also like the look of this pedestal sink. This would cost about half the price (or less) of the above console table. I know pedestal sinks aren't typically used in a three piece bathroom, but the added built-in storage should make up for the lack of cabinetry, so maybe that is not a big deal?

Option 3: Another option we are looking at is modifying a kitchen cabinet from Ikea (maybe the Adel?) to fit one of their smaller sinks such as the Odensvik. This type of cabinet option would not seem as spacious as the above options, but has a good depth of 18.75" and could obviously coordinate well with matching wall cabinets.


Option 4: This is probably unlikely, but we are actually considering using the sink that was in the upstairs bathroom when we bought the house. It has been sitting in our garage for 2.5 years (didn't have the heart to throw it out) and is in great shape, but we would probably need to spend about $300 to re-finish the sink and re-plate the legs. The question here is whether or not it suits the style that we are going for (probably not).

Monday, February 7, 2011

Video: Custom Pocket Door Installation

Here is a time lapse video showing the installation of one of our basement pocket doors (it actually took just over one hour, but we sped it up so the video is just over one minute).

Tuesday, February 1, 2011

Tub Installed

I could not procrastinate installing the tub any longer, so Meredith's Dad helped me install it last night. I had planned to take photos of the process, but sometimes getting the job done is just more important. The instructions provided by Rona and the tub manufacturer were basically useless, so this was the process we followed:
  • Framed walls on all three sides for a very tight fit (only 1/8" or so of extra space).
  • Inserted tub to make sure it fit the space, then removed it.
  • Installed 1x3 pieces of strapping horizontally to support underneath the edge of the tub where it touches each wall.
  • Inserted tub to make sure it hung at the right height when supported by the 1x3 (in our case we tried to have the tub level with the apron 1/4" off the ground), then removed it.
  • Mixed three bags of mortar and spread a large bed of mortar underneath the tub at the approximate height so that the tub would rest on it.
  • Inserted the tub to see if it was the right height.
  • Removed the tub, removed or adjusted some of the mortar, and then reinserted the tub until the tub was at the right height (did this 3-4 times).
  • Once the tub was at the right height (i.e. most of weight on the mortar, but edges supported by 1x3), stepped in the tub to push it down onto the mortar.

Time for framing and then more plumbing. Yippee!

Followers