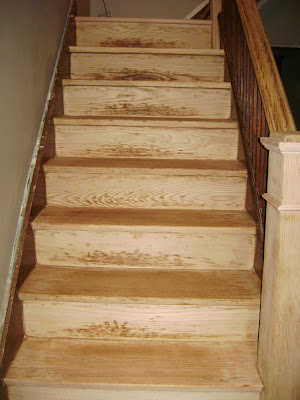
Last Sunday, when all of Canada was celebrating a win in the gold medal hockey game, I was celebrating the end of this stairs project (of course I was celebrating the hockey win as well).
Our stairs were quite noisy, so we tried to reduce this noise by screwing the risers to the treads and screwing corner brackets to tighten the treads to the risers; this didn't seem to make much of a difference. I then applied construction adhesive to all of the seams (i.e. tread/riser, tread/stringer, riser/stringer); this reduced the noise on the stairs by about 80-90%, so I was happy with that result.
 Then the sanding began! We put up plastic to try to reduce the amount of dust going into the rest of the house. I then sanded all of the old steps, posts, and railings using a palm sander and by hand, starting with 60 grit and 80 grit sandpaper. This took hours ... much harder than sanding a few bedrooms with a drum sander and edger.
 Oak trim was then installed on the posts. We bought trim that was similar to the original trim from the posts. Also, beech bullnose pieces were installed on the edge of the landings. Everything (old and new) was then sanded with 120 grit sandpaper to prepare for staining.
 The treads, risers, posts and railings were then stained using a custom stain that we ordered to match our hardwood floors. We had originally planned to paint the risers white, but after working hard to create beautiful curved oak risers, we decided to go ahead and stain all of the risers as well.
Once that was dry, three coats of oil-based polyurethane were applied. I will take some photos of the "finished product" in the daylight and post them this weekend. We still need to install hardwood flooring on the landings, install the baseboards, paint the stringers/spindles/baseboards white, re-paint the wall, and have a runner installed. The hard work is done though.
