 I thought I might show the step-by-step process for hanging the french doors between the living room and dining room. Obviously the process is much different (i.e. easier) with new, pre-hung doors, but we are trying to keep as many original details as possible, so we bought some oak french doors through craigslist (for $30!) and have hung them to the existing door frame.
The first step was to identify the hardware to be used to hang the doors. The hardware that came with the door was smaller than the stuff used in the rest of the house, so I removed it and got replacement hardware from other doors/frames sitting around the house.
 Next up I had to mount the eight hinges: four on the door frames and two on each of the doors. I decided to keep the hinge locations in tact on the door frames, so I just needed to screw those hinges in place. I then lined up the door frames to the doors and marked the locations of the new hinge locations on each door. A wood chisel was then used to remove the wood where that hinge would go.
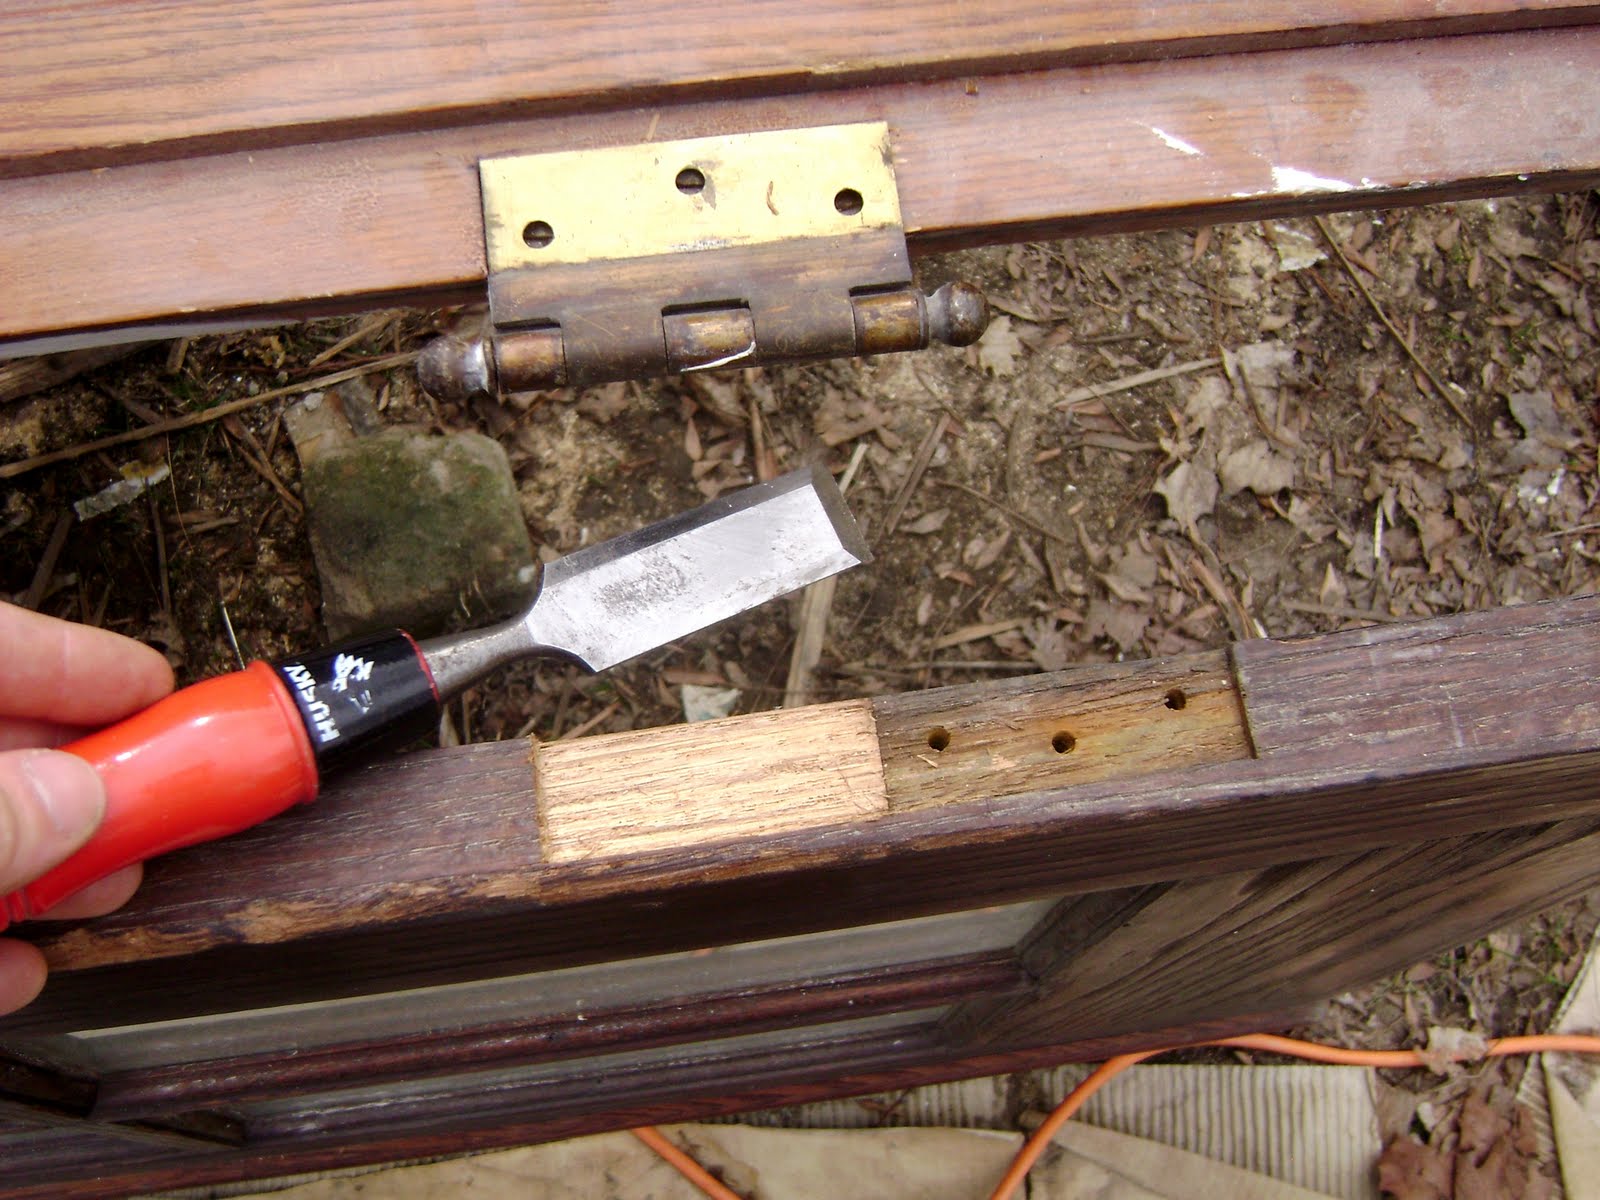 The top hinge was then secured to the door with three screws, while the bottom hinge was secured loosely with just one screw. This gives you a little bit of play when first hanging the door to the frame. You can bolt the top hinges together and then play with the bottom hinge a bit to line up the bottom hinges and bolt together; once everything is in place, I then secured the bottom hinge with three screws as well.
 To hang the first door, I put the door frame (which has been ripped down to the right width and cut to the right length) up against the wall. I drill a pilot hole into the frame beside the top and bottom hinge; the frame is then secured to the stud with two finish nails. These two finish nails should be sufficient to support the door temporarily, so I then hang the door on the hinges (see above for two part process for that). I then open and close the door to make sure the height and angle are correct with the floor. Because the floors and walls are not exactly level in our old house, this is a critical step. When I initially hung the door, it was fine when closed, but would hit the floor when opened past half way. To adjust the height, I would un-hinge the door, remove the door frame from the stud, move it up 1/2" or so (whatever is necessary), and then secure it with two finish nails again. Once the correct height is reached, the door would be secured with two 3" screws that each go through one hole in the door frame hinge. I sometimes add additional screws through the door frame itself.
 One door is now hung. I then measure how much space will be needed for the other door and door frame, and then build out the studs and shim accordingly. In this case, I built out almost 4" since the new doors are obviously about 4" skinnier than the doors that used to be in our house.
 The second door was then hung using the same basic process described above. However, in this case, extra care was taken to shim the door frame appropriately so that the doors are not too far apart or close together. When I initially hung this second door, it was almost 1" lower than the other door, so I had to remove it, move the door frame up 1", and then re-hang it -- this is why it wais important to hang with two finish nails first and then move onto screws only once you know everything is in place.
 Now that both doors were hung, the top piece of the door frame was cut to size and installed with a few finish nails on each side. You can see the 4" of space to the side of the door frame in this photo; we will need to drywall and paint this area since some of it will not be covered by trim.
 And presto - we have french doors! They are horribly dirty in these pics, but fit well in the space and do not get in the way at all (we only wanted to add doors onto the first floor if they did not crowd the space). I think these will look great when they are painted white and our original trim is added back onto the door frame.